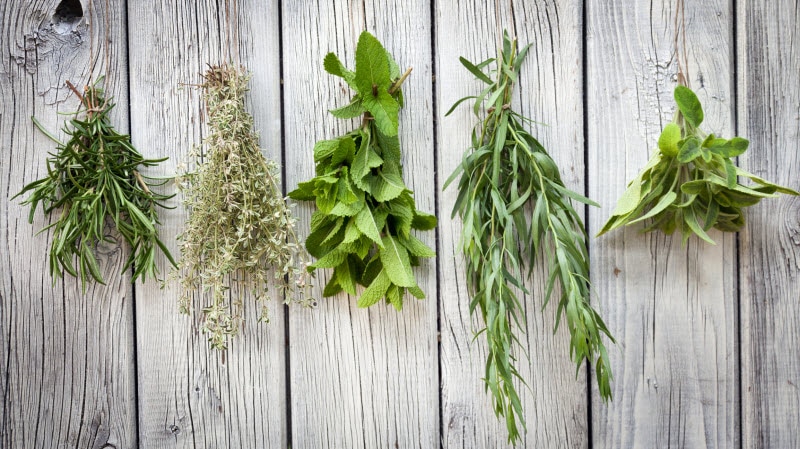
Whether you bought them from your favorite store or harvested them on your windowsill, there tends to come a time when you have too much basil than that pesto recipe calls for. What to do?
Two words: Dry them. Doing so lets you get the most out of the herbs you’ve purchased or grown, allowing you to create a perfect present, use them in the future, and braid them into your self-care routine (who doesn’t love a lavender-infused bath?) What’s more, herbs are rich in health benefits.
“The true power of herbs lies in their wealth of protective polyphenols—plant compounds with potent antioxidant and anti-inflammatory effects,” The Washington Post reports, adding, “Piles of studies show that polyphenols in herbs help combat such diseases as cancer, heart disease, Alzheimer’s, diabetes and more.”
And while we may have been culturally instructed to believe that fresh herbs are best, don’t buy into the hype: Registered dietician and nutritionist Ellie Krieger says that “they are at least as beneficial as fresh, if not more so, because the drying process actually concentrates the polyphenols and flavor.”
Plus, when herbs are dried, they’re safe from mold, bacteria, and yeast, and, according to Mother Earth News, remain potent up to twelve months.
With this in mind, here’s all you need to know to take your herbs from fresh to preserved:
How to Dry Herbs
1. Select your herbs
Herbs add a delicious and nutritious punch to a number of culinary dishes (as well as in mocktails, body lotions and more) but if you’re setting out specifically to dry them, do know which ones dry best.
The Spruce says that delicate herbs, such as borage, basil, chives, cilantro and parsley, lose a lot of their pizazz when dried and should be frozen instead.
Heartier herbs, however—dill, bay, lavender, lemon balm, oregano, rosemary and thyme—do well with drying (and taste fantastic in everything from teas to salad dressings).
2. Purchase herbs wisely
One of the best ways to weave more herbs into your diet is to grow them in your garden or on your windowsill. But those who have the antithesis of a green thumb—or those simply too busy to be bothered—will reap the same health benefits from purchasing herbs at the store. Ensure the leaves are not wilted or yellowing—they should be as perky as you’d like them to taste. Wash, spin or pat-dry, wrap them in a damp paper towel, and stash them away in an air-tight container until they’re ready to be used or dried.
3. …and pick just as judiciously
It’s crucial to harvest herbs at the right time. Do so on warm, dry mornings after the dew has evaporated, and pick before the flowers develop.
4. Keep an eye on the time
Fresh herbs are no longer usable—for drying or immediate use—if the leaves have turned dark or brittle, or if the stems have begun to show signs of mold.
5. Choose your method
There are several ways to dry herbs—it comes down to you, your preference, and your environment.
One of the most popular methods is to air-dry them in your home. Not only is this technique simple and inexpensive, but the slow-drying process required of it helps retain the herb’s essential oils and, thus, flavor. (Just be sure to avoid the kitchen, as the humidity will affect the herbs.) Place the leaves of the herb you wish to dry on a plate and set aside in a cool, dry place for several days.
Alternatively, you can use muslin or thin paper bags. Tie herbs at the neck and hang them upside down. Keep the wrap loose and eschew plastic, which may encourage mold development.
Happen to have an old piece of screen? Use it to dry your herbs. Place a cheesecloth over the screen, arrange the herbs on top, and set the tray in a place out of direct sunlight and with good ventilation.
If you happen to live in a warm, dry climate, you can also “solar dry” your herbs. Place outside during the day but bring in at night. (A word of caution with this method, however: Avoid drying herbs in too much direct sunlight, as it may cause them to bleach.)
Lastly, consider oven-drying your herbs. Space out herbs on a muslin tray, place in the oven on the lowest temperature, and keep the oven door ajar to let moisture escape. Turn the leaves over at 30 minutes (expect them to be dry within an hour) and leave in the oven until cool. Taste of Home notes that this is an especially good approach when drying the leaves of sage, rosemary, mint, parsley, and thyme. (For the record, you can microwave herbs too but this should only be done as a last resort, as microwaving degrades their flavor.)
6. Stow away
Once herbs are dried, discard ribs and stems and crumble the other parts with your fingers. Store in small, airtight containers until they’re ready to be used. Do note, however, that herbs should be completely dry before storing them. Don’t forget to label them and keep in mind that you should use only a quarter of dried herbs in recipes that call for their fresh iterations. Then, whip in to your creations —and relish.

