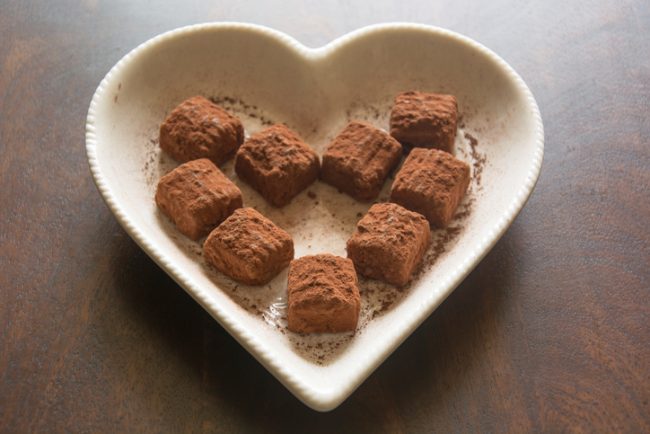
With Valentine’s Day just a few weeks away, many of us have chocolate on the brain. And whether you’re looking to treat yourself or spoil someone special, there are so many great options you can buy or make no matter what kind of healthy lifestyle you lead. In fact, vegan chocolate tastes just as good or even better than the regular milk chocolate you’re used to.
What is vegan chocolate?
Don’t let the vegan part scare you; simply put, vegan chocolate just doesn’t include the animal-sourced ingredients commonly found in regular chocolate. As a result, it’s naturally free of dietary cholesterol as well. Some chocolate products on the market even have dyes that come from insects, and many include honey, which vegans also avoid.
Luckily, you can make your own vegan chocolate at home that’s free of animal products and artificial ingredients and that happens to taste incredible too. Just follow the six simple steps below.
5 steps to homemade vegan chocolate candy
1. Gather your ingredients
For starters, you’ll want to have the right supplies on hand. You’ll need some candy molds as well as a double boiler. Choose a silicone candy mold for easy removal and a safer option versus those made with cheap plastics that may contain toxic ingredients.
Next, you’ll need some raw cacao powder, raw cacao butter, a liquid unrefined sweetener and any add-ins you may wish to include, such as spices or superfoods.
Supplies:
- Silicone candy mold
- 8 oz. raw cacao powder
- 8 oz. raw cacao butter
- Double boiler
- 2 - 3 oz. ounces (about 1/4 cup) liquid unrefined sweetener, such as maple syrup, brown rice syrup, raw agave or date syrup
- Optional add-ins: cinnamon, ginger, cardamom, cayenne, maca, maqui, and lucuma
2. Choose your sweeteners wisely
Unlike the refined cane sugar or high-fructose corn syrup found in most processed chocolate, natural sweeteners are much gentler on blood-sugar levels, and many come with some trace nutrients. Refined sugar is also often processed with refining agents such as animal bone char, which isn’t vegan, and some chocolate products contain honey or animal derivatives, such as gelatin or coloring, which may come from insects.
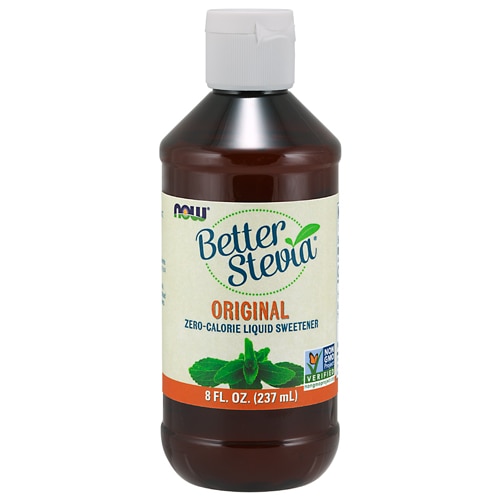
While granulated options such as organic cane sugar and coconut sugar are vegan, they don’t blend well into the melted chocolate and may cause the end product to be gritty in texture. To avoid these issues, choose a liquid natural sweetener instead. Great options include pure organic maple syrup, organic brown rice syrup, raw agave nectar and date syrup. If you prefer a natural sugar-free option, you can use 10 small drops of liquid stevia.
3. Create your chocolate base
The raw cacao butter is what gives chocolate it’s firm texture and rich, luxurious flavor because it’s essentially all the natural fat found in the cacao bean; however, it doesn’t have that chocolate flavor we all know and love — that comes from the cacao powder.
Melt the raw cacao butter over a double boiler until it starts to turn to liquid. You’ll need to stir frequently with a wooden spoon to prevent burning and help it melt quickly and evenly. After it’s completely melted down and turned to a golden color, turn off the stove and set the melted cacao butter aside for two to three minutes to cool down slightly. Then, carefully pour the melted cacao into a high-speed blender that has a container that can withstand high heat and mix everything thoroughly, such as a Vitamix.
Tip: It’s important not to add the melted cacao to the blender right after it comes off the heat source because it will be too hot. You also don’t want to wait too long or it will solidify again, so be sure to strictly adhere to the two-to-three-minute wait time before blending it with the other ingredients.
4. Blend your ingredients
Now it’s time to blend the ingredients together. Add the melted cacao butter, cacao powder, liquid sweeteners, and any add-ins to the blender and process for 15 to 20 seconds until the mixture is fully incorporated. The mixture should retain no traces of powder from the superfoods or cacao powder.
Tip: If you choose to use superfoods, add no more than two to three teaspoons total so they don’t overpower the chocolate or create a powdery texture. Choose maca for an energizing yet relaxing vibe that has a malty and butterscotch flavor, lucuma for a natural caramel-like sweetness that’s still low on the glycemic index or superfood berries such as antioxidant-rich maqui and açaí berry powder, which all pair wonderfully with chocolate.
Other options include spices such as cinnamon, ginger, cayenne and cardamom or even a few drops of peppermint extract for a mint-chocolate option.
5. Pour it into molds
Once the mixture is blended, it’s time to pour it into the candy molds. To make the process easier, place your candy molds on baking trays that provide a firm base before pouring the mixture into the molds. A baking tray will allow you to transport your molds to set somewhere more easily.
Carefully pour the blended chocolate mixture into the molds, filling them to the top. Work quickly, as the chocolate will start to solidify the longer this takes. Once finished, place the molds somewhere away from a heat source, such as on a counter away from the oven, or even in the fridge if you have room. The cooling process can take anywhere from one to two hours, depending on the temperature of the area where you’re storing the candy.
6. Package it up
After your candy is completely solid and firm to the touch, package it up. You can choose colorful bags or containers or wrap it up in individual sachets, which are available at craft stores. If storing it at home, keep it in BPA-free plastic or glass containers.
Be sure to enjoy your chocolate within a week or two, and store it properly. Because it doesn’t contain preservatives, natural chocolate may melt more easily when exposed to heat. To play it safe, keep it in an area that’s 65 degrees F or cooler at all times.
Now enjoy your vegan chocolate! Just don’t forget to share your bounty of chocolaty goodness with your loved ones.


